Quick Start
Follow the steps below to use SlicerCART.
Important Note
The current version IS NOT able to:
Start Segmentation and Classification
Open 3D Slicer
Launch SlicerCART
Select “New configuration” or “Continue from existing output folder”, and click on Next
New configuration -> Start a new project and define its specific configuration (clicking on Next will show a pop-up window that allows the user to customize SlicerCART settings)
Continue from existing output folder -> Resume previous tasks for a given project (clicking on Next will resume the specific project-folder configuration)
Use template configuration -> Not available (for now).

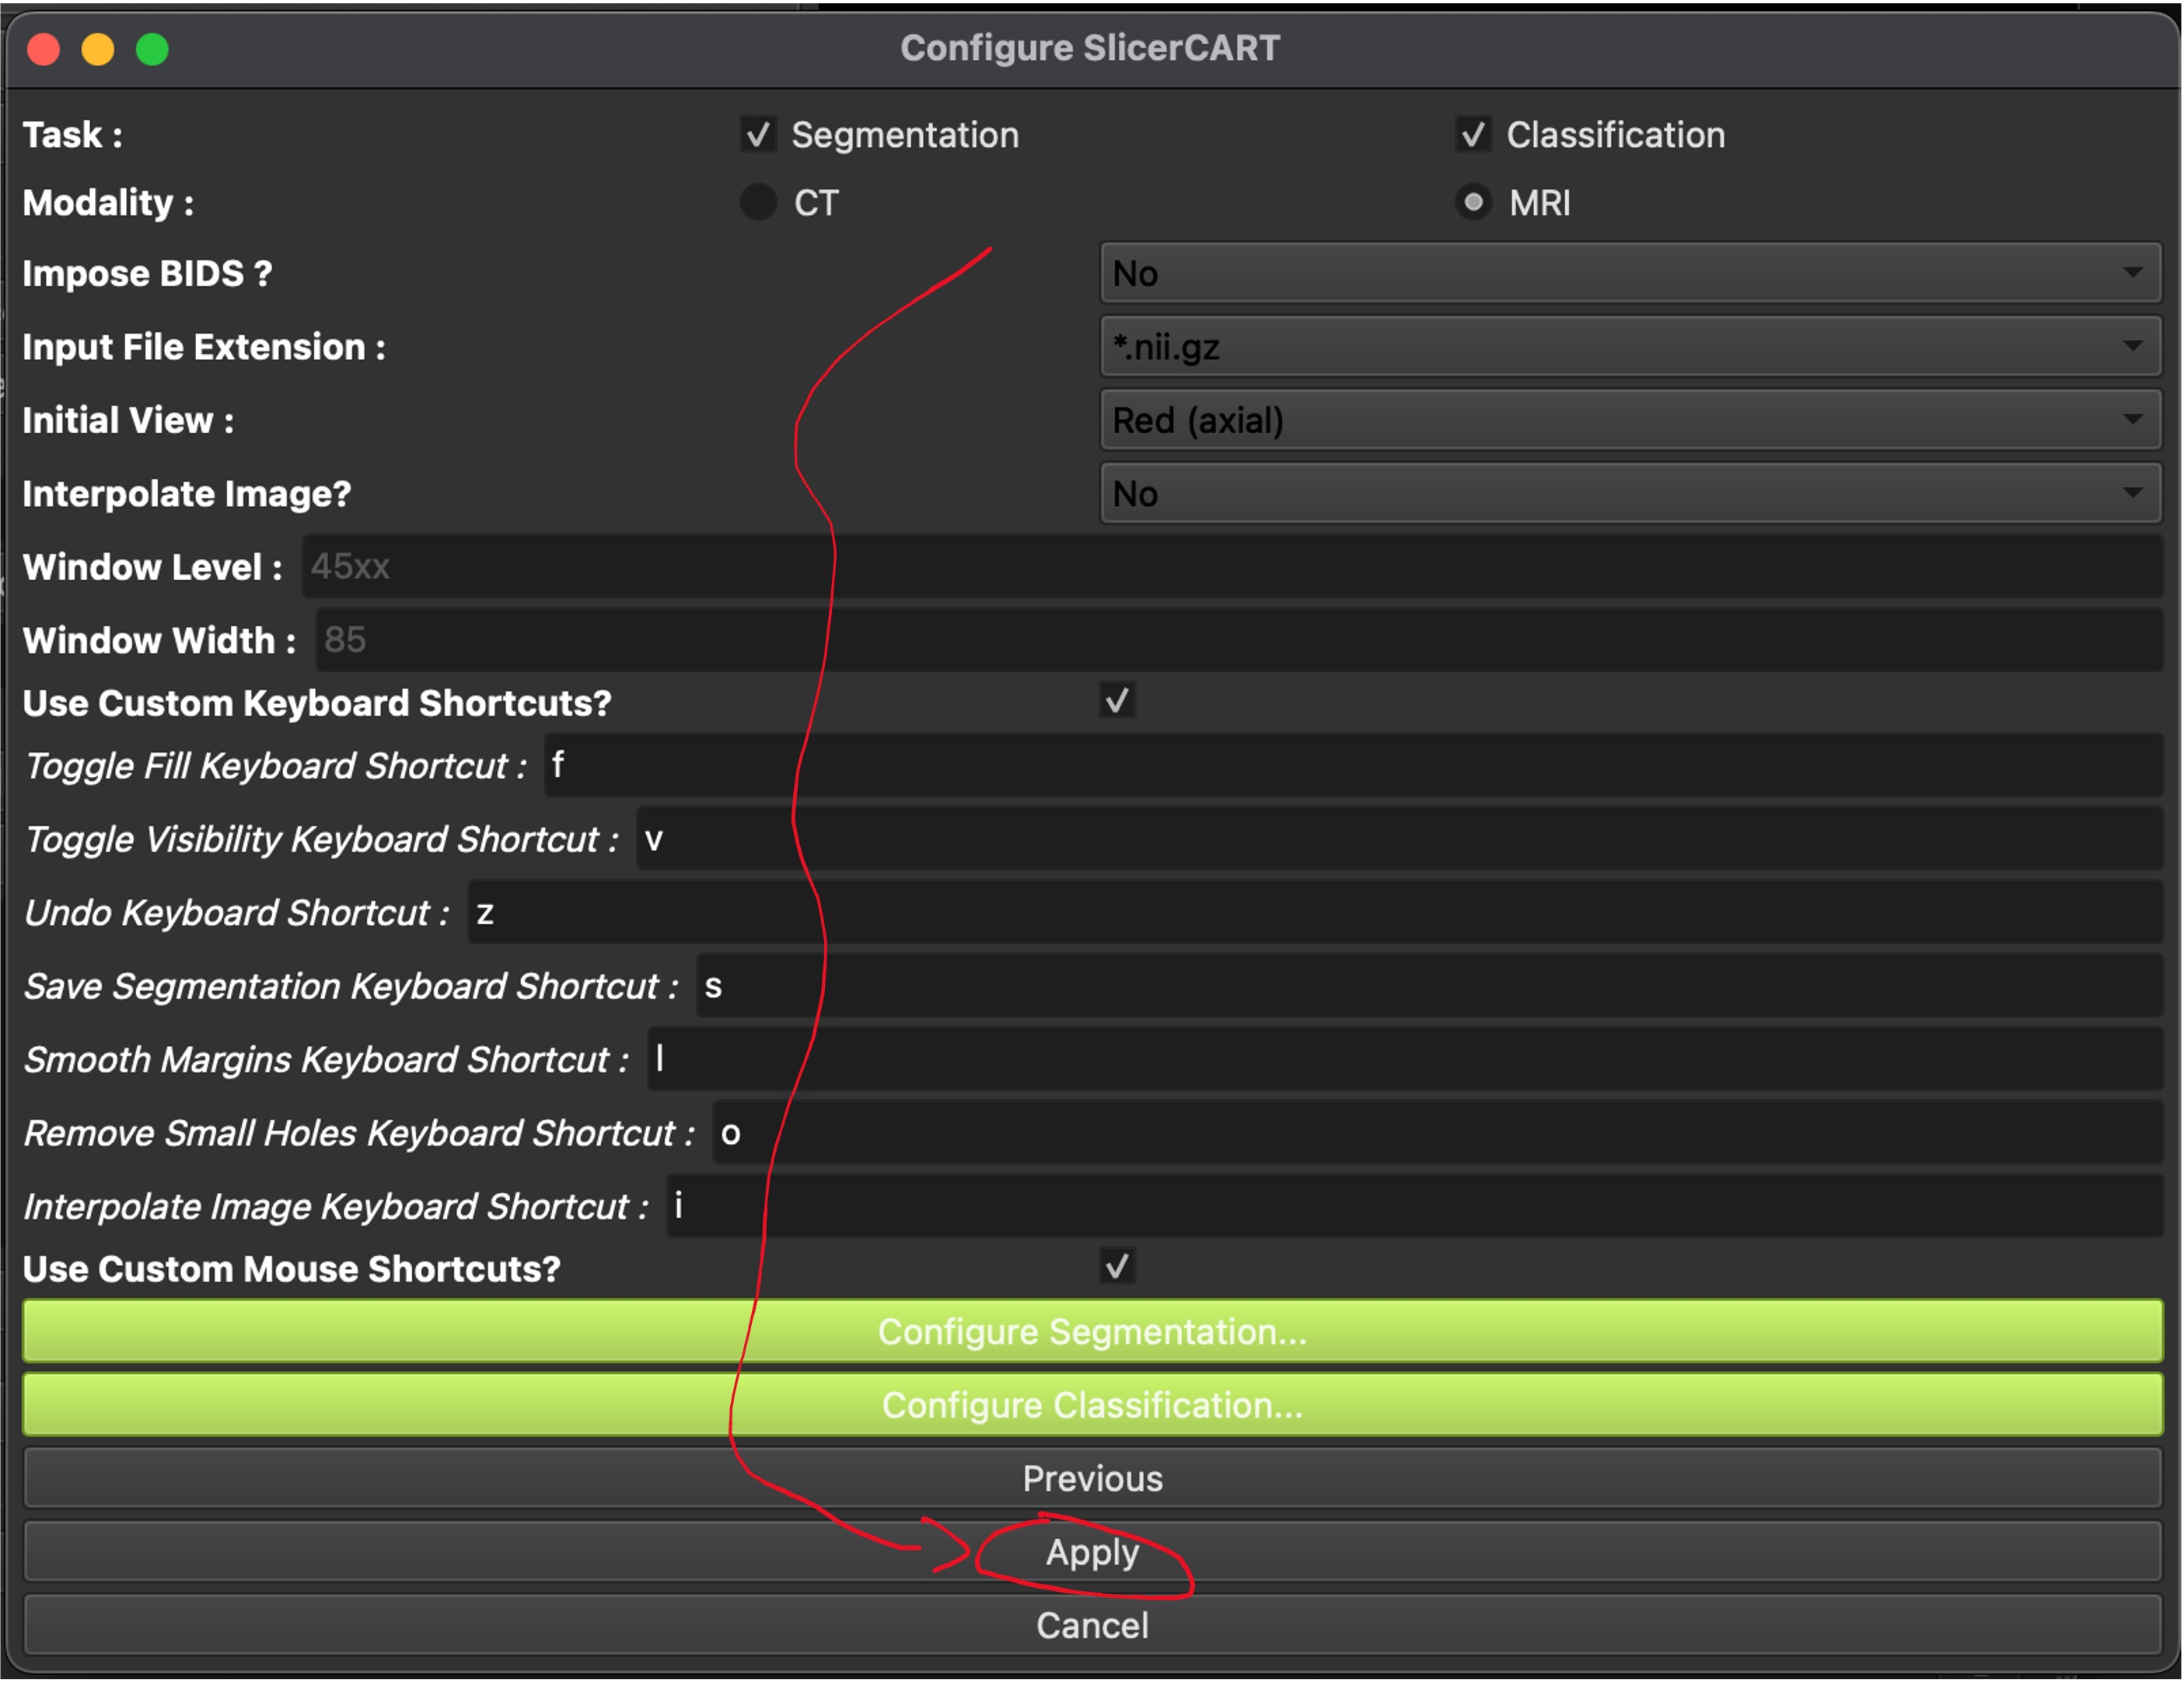
Edit the SlicerCART configuration interface to define project-specific configuration
N.B. Only if “New Configuration” has been selected (otherwise, go to 7 ).
Select if you will complete segmentation and/or classification tasks, the modality (takes only one), if you impose BIDS (will pass a BIDS validator test before loading volumes), input volumes file extensions, etc.
By default, at least one segmentation label is required. Classification labels can be modified as wanted (no minimum required).
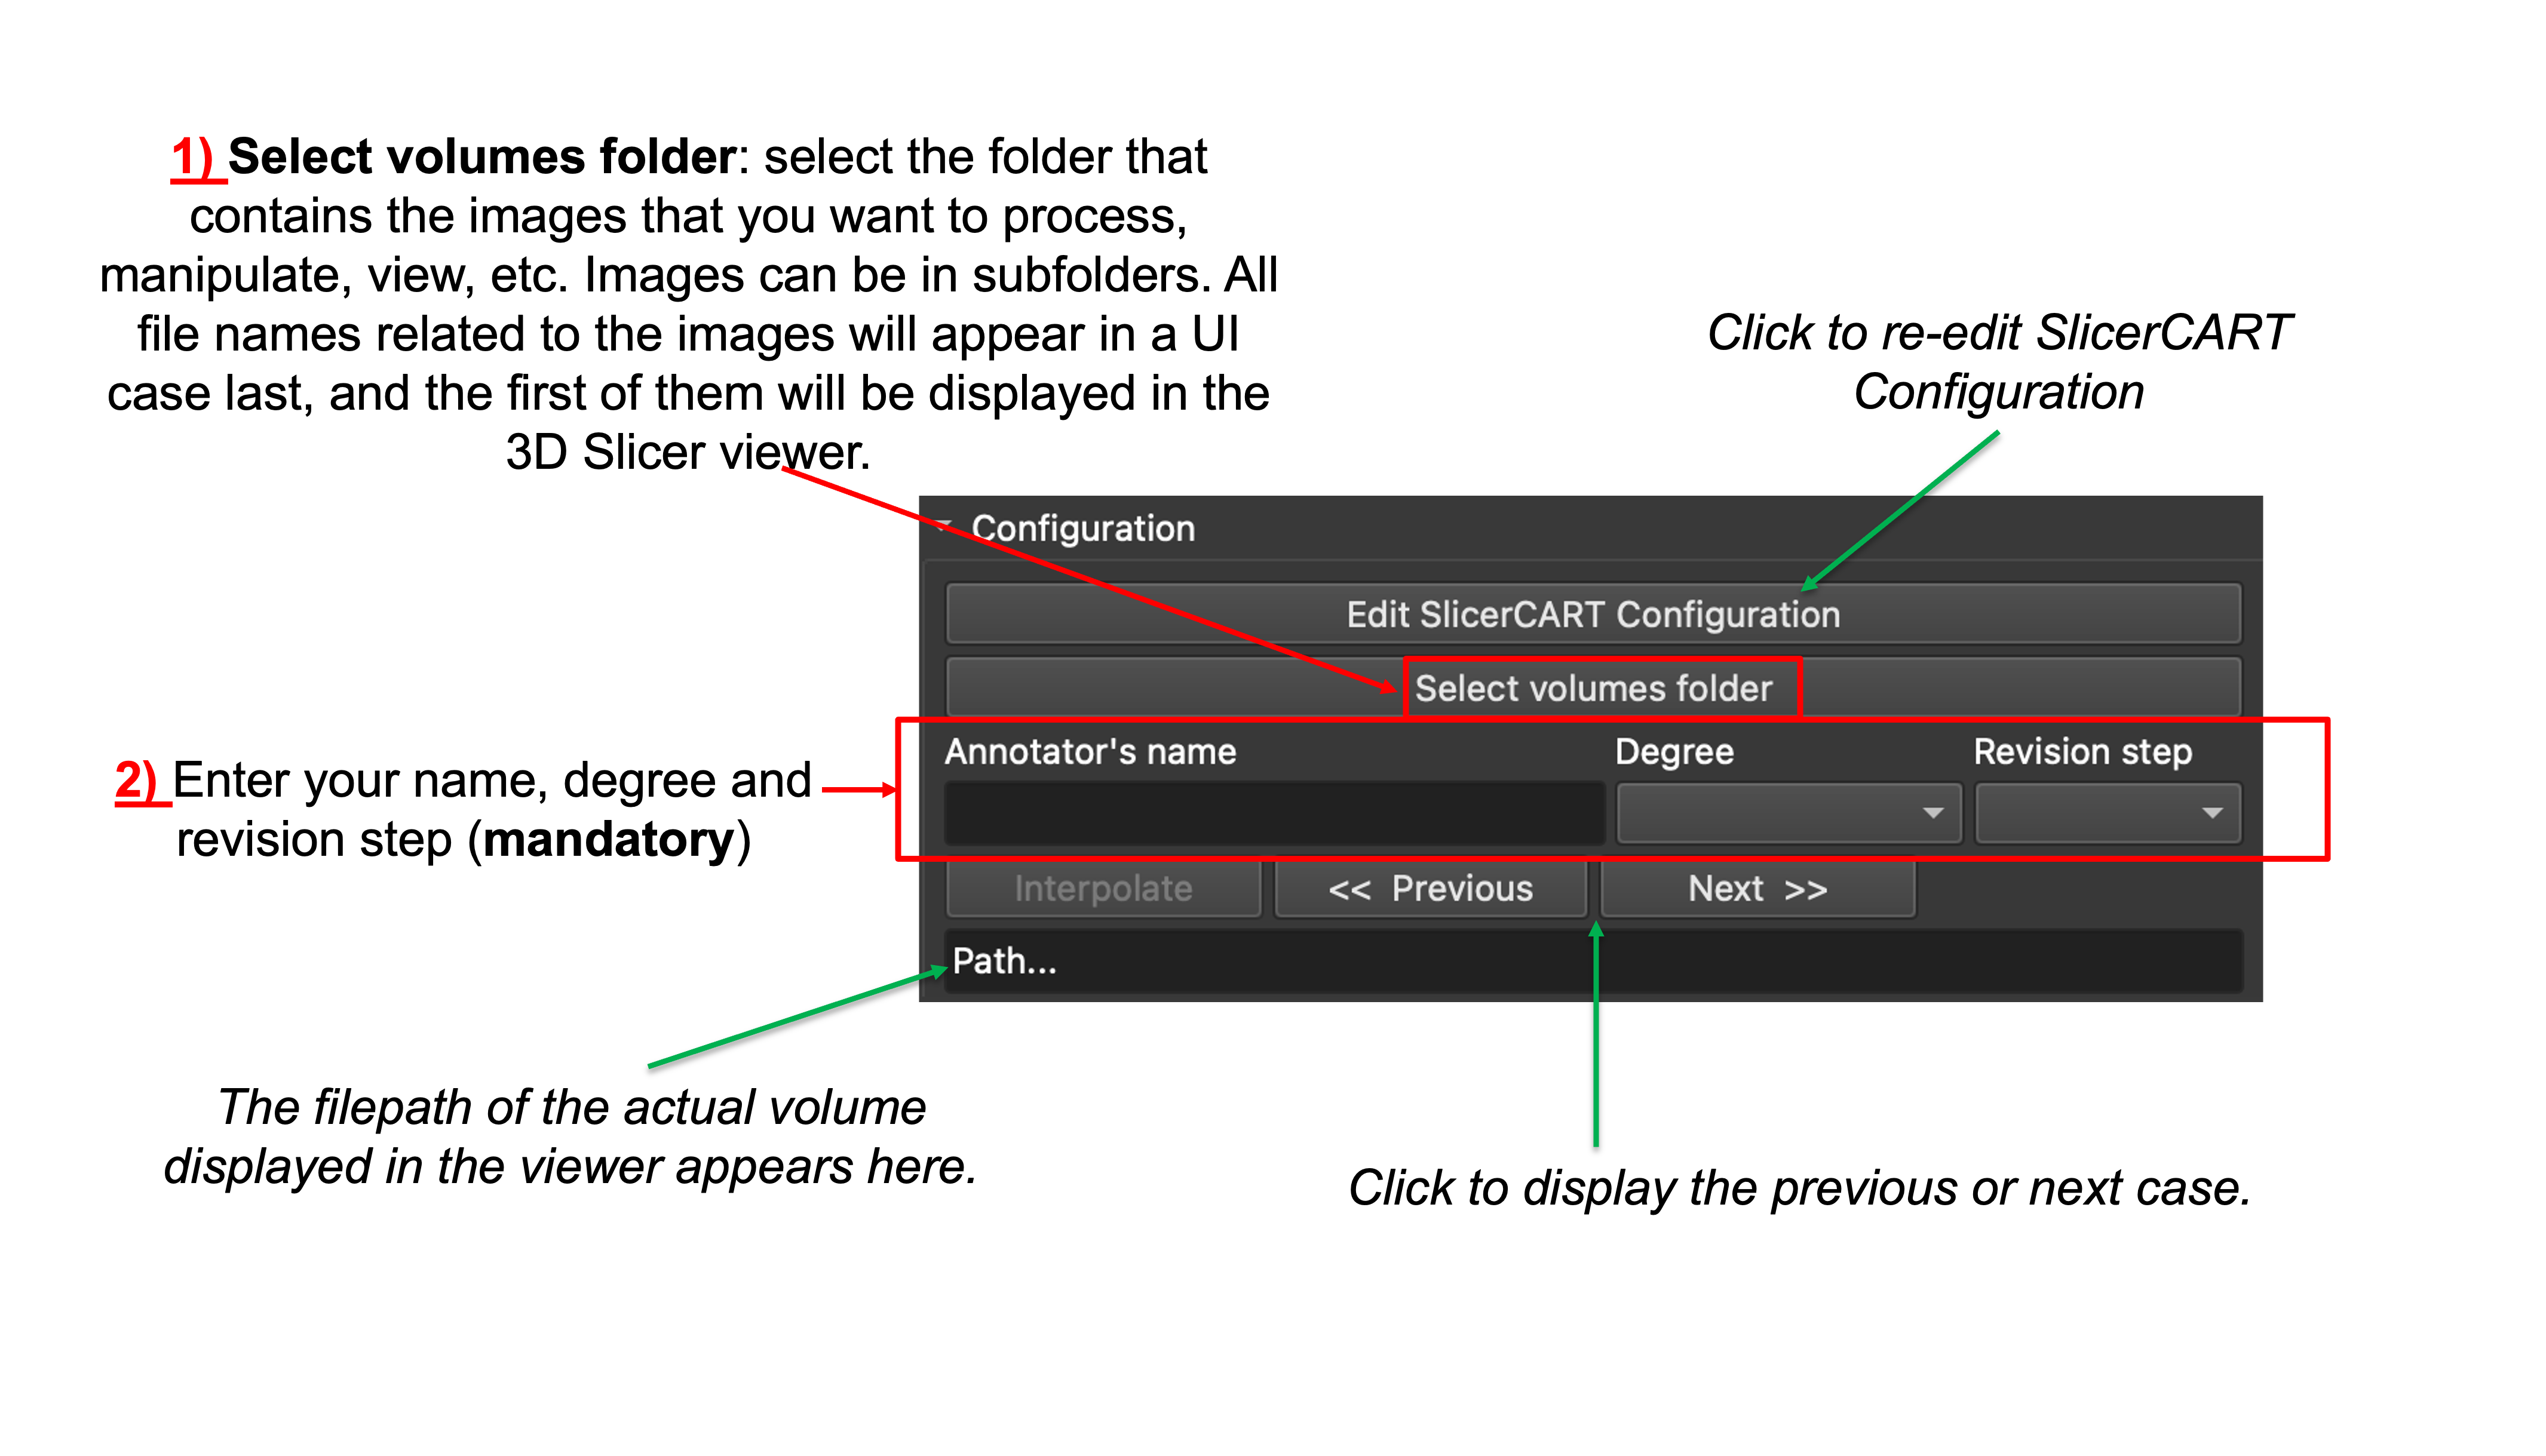
Select volumes folder, and specify annotator information
Select the folder that contains the images that you want to process (BIDS folder, will not consider images in derivatives)
Specify the annotator name, degree and revision step (all are mandatory for saving)

Note
If loading cases in the UI fails, please open an issue on the GitHub Issues page, or ask a team member. If this step has not succeeded, you will not be able to use SlicerCART.
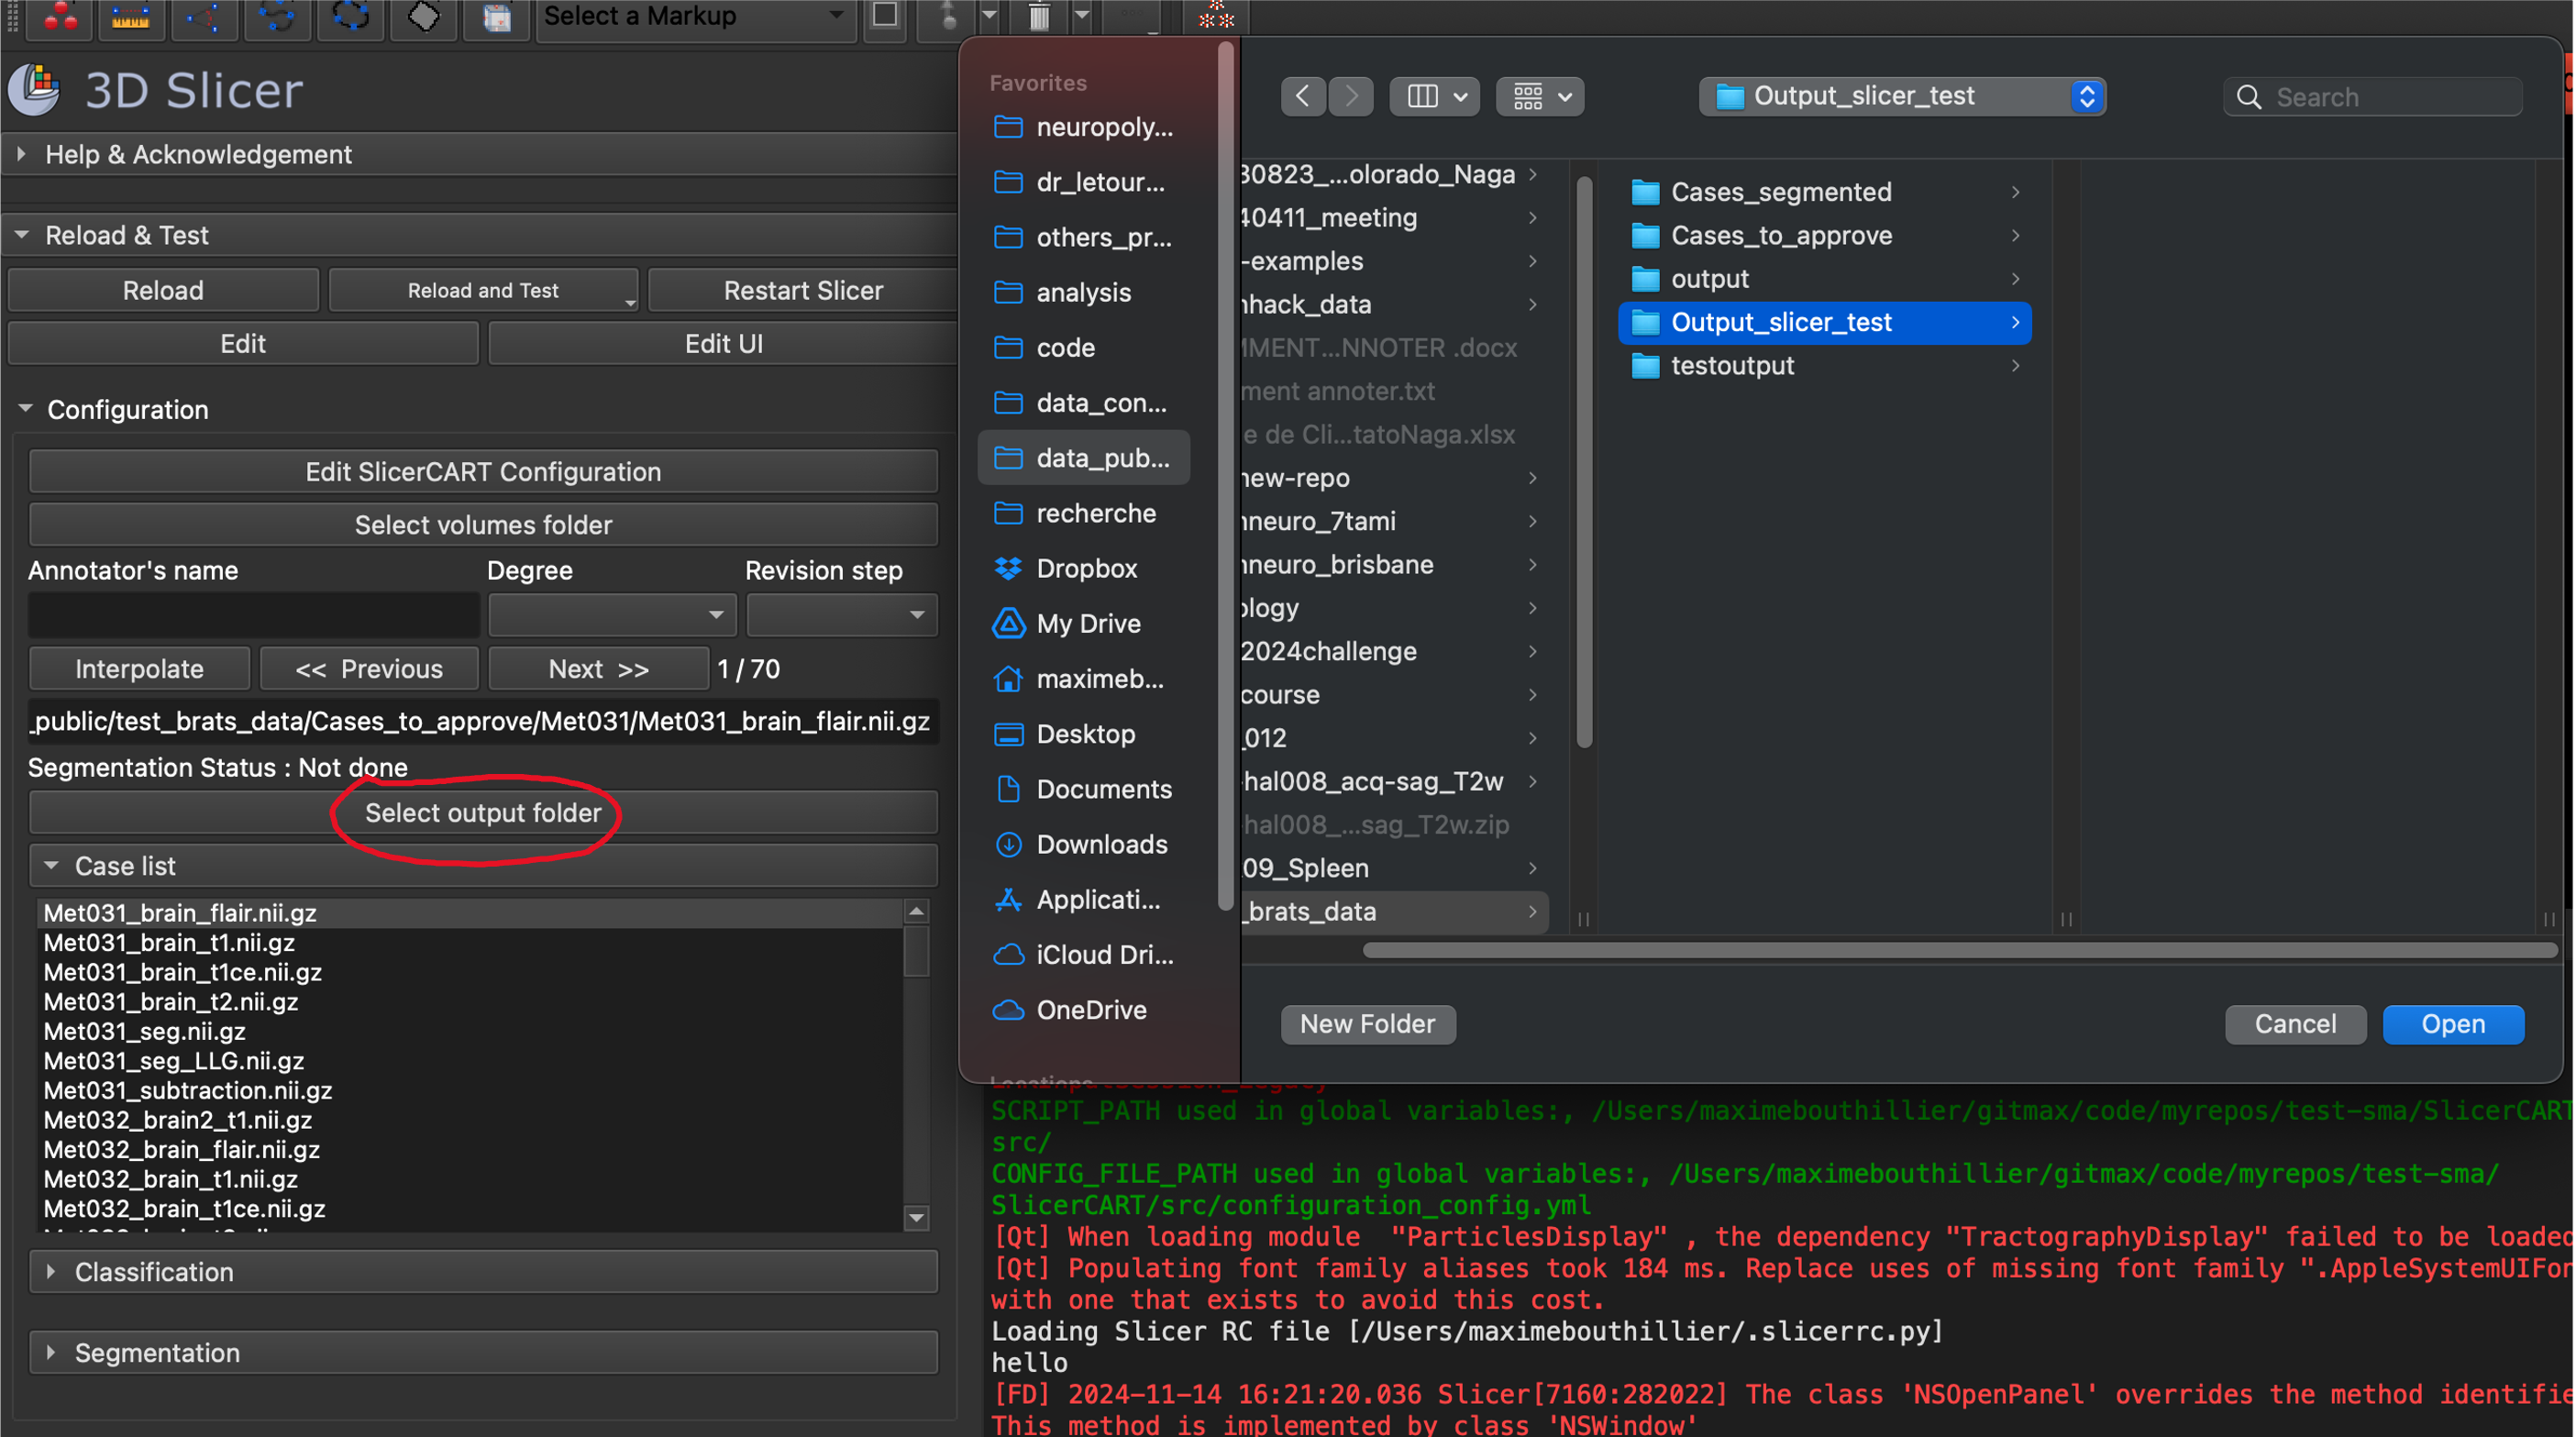
Select output folder
Select the folder where output data (e.g. segmentation masks, statistics) will be saved. If there is already an existing configuration in that folder, note that this folder configuration will we considered for the current project tasks.
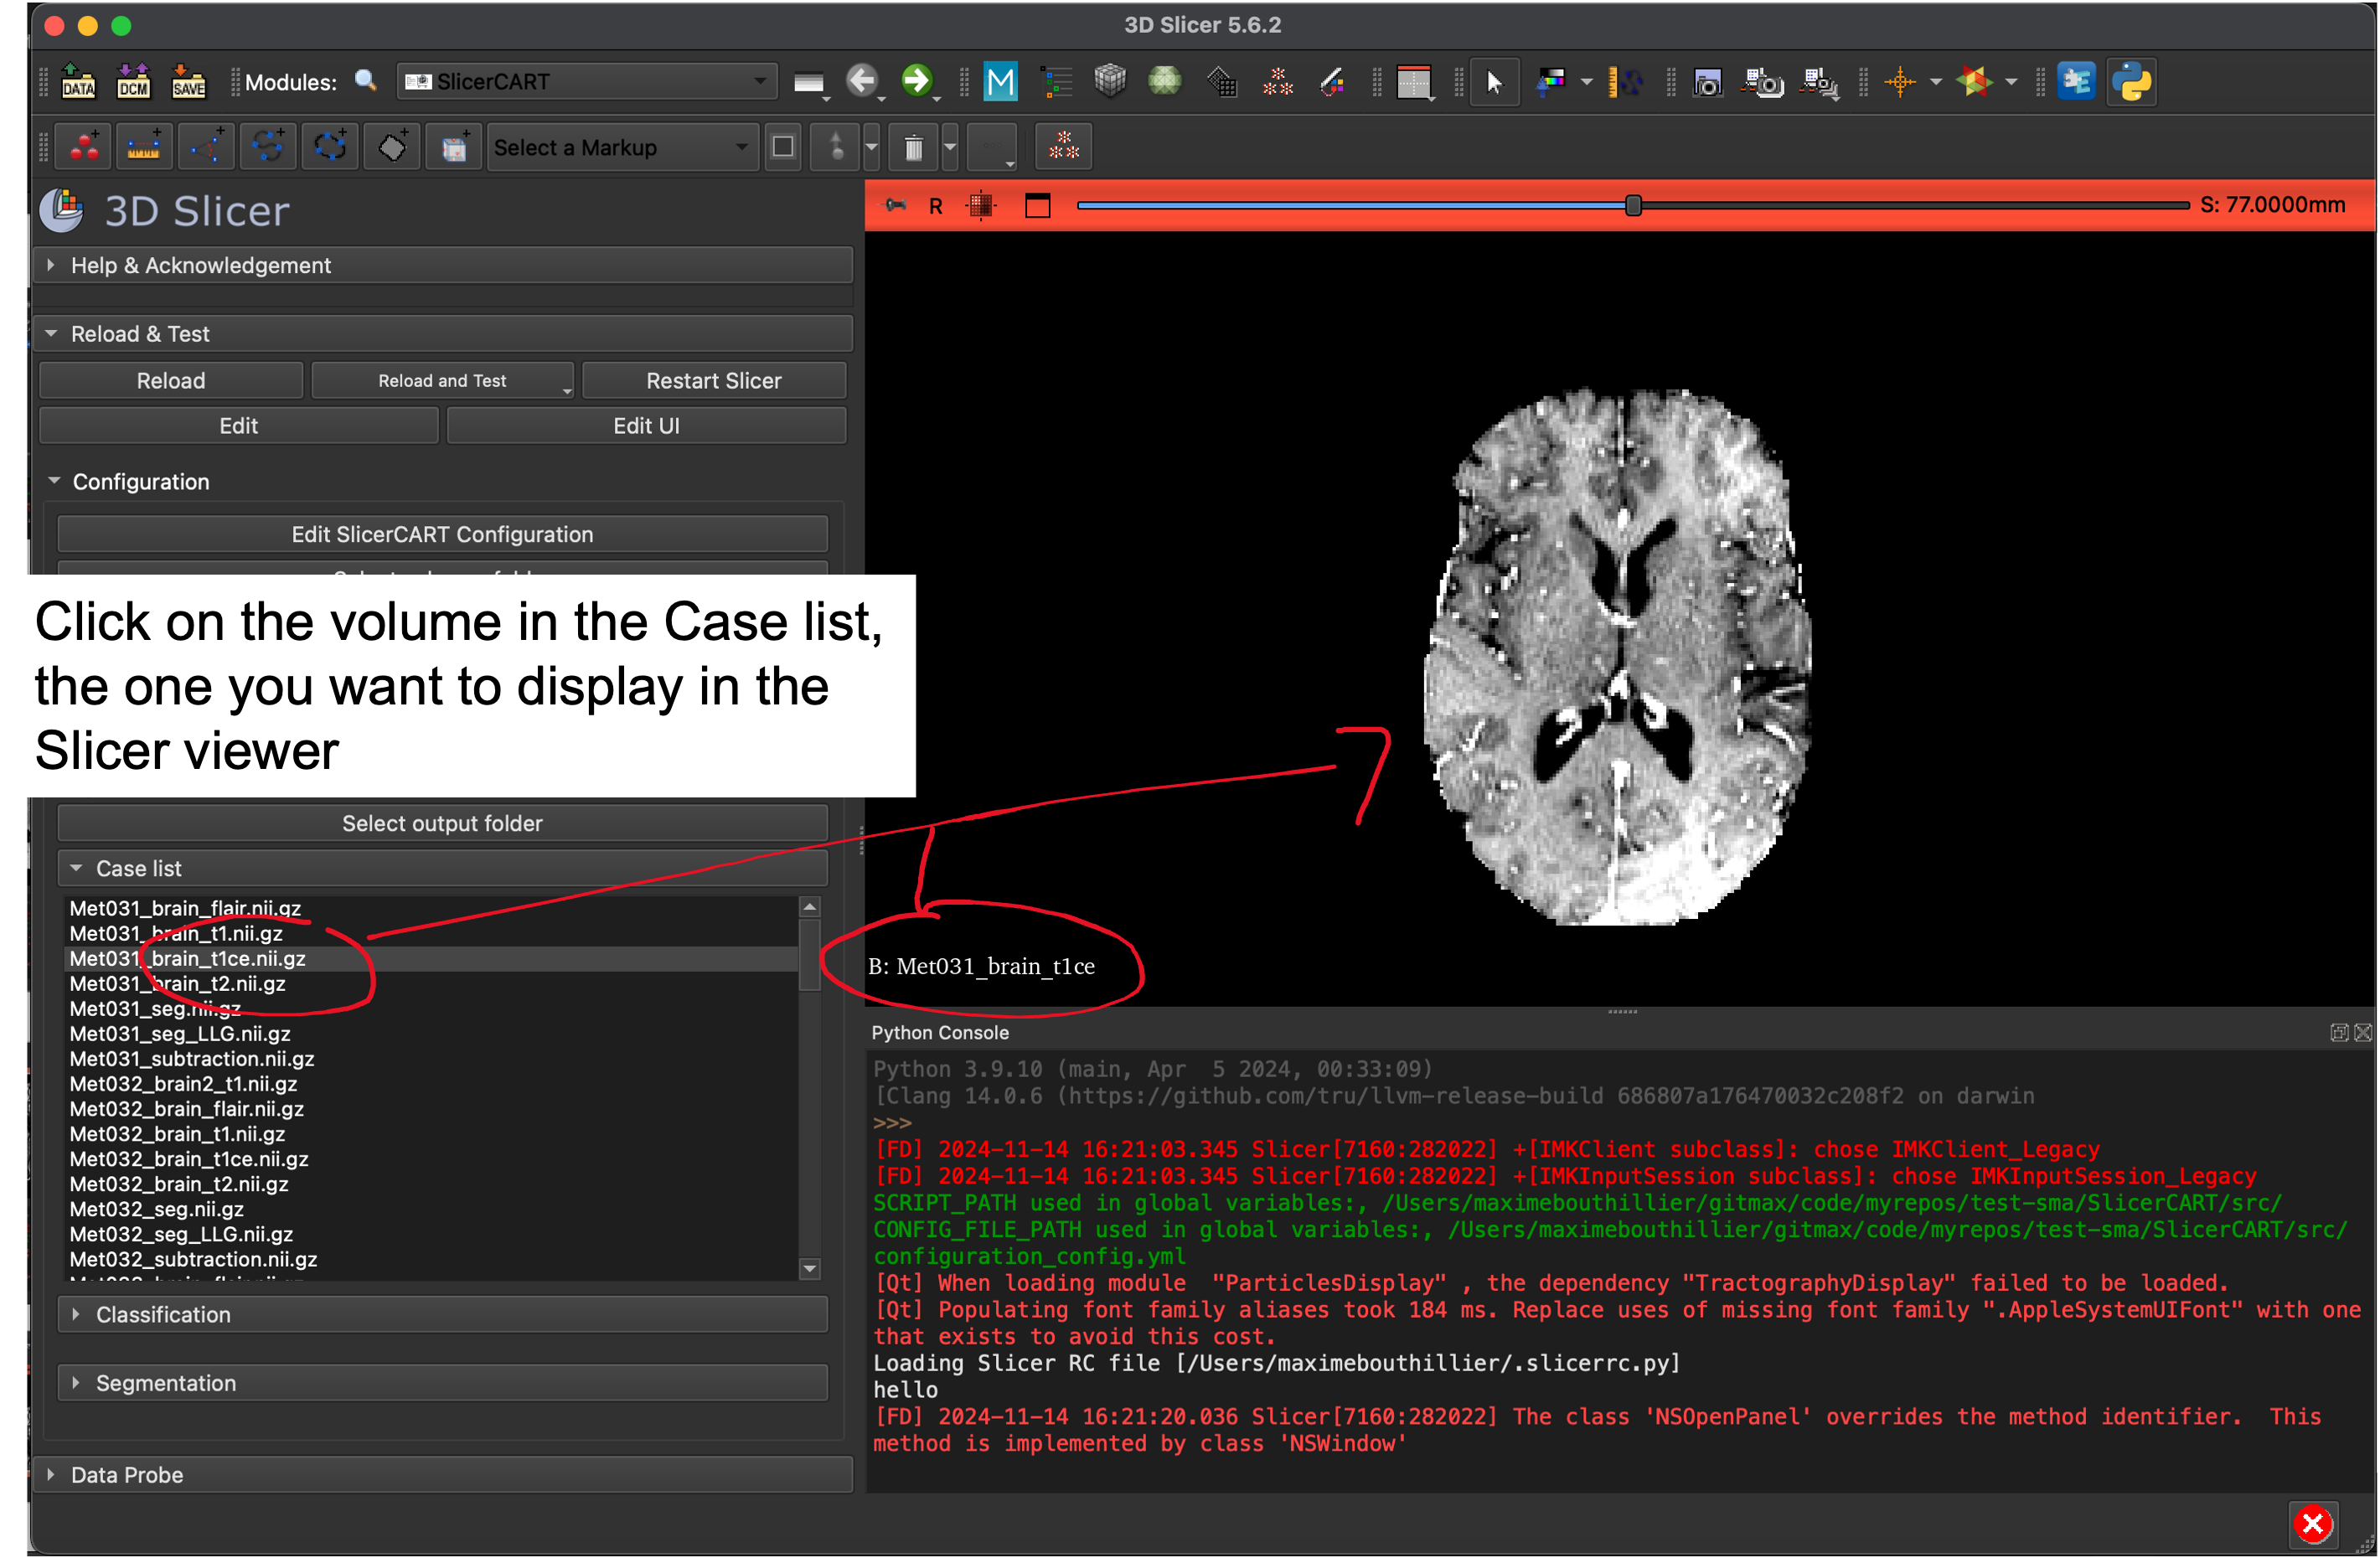
Display Volume to Segment
Click on the case in Case list you want to display. Perform classification or segmentation from the appropriate window.
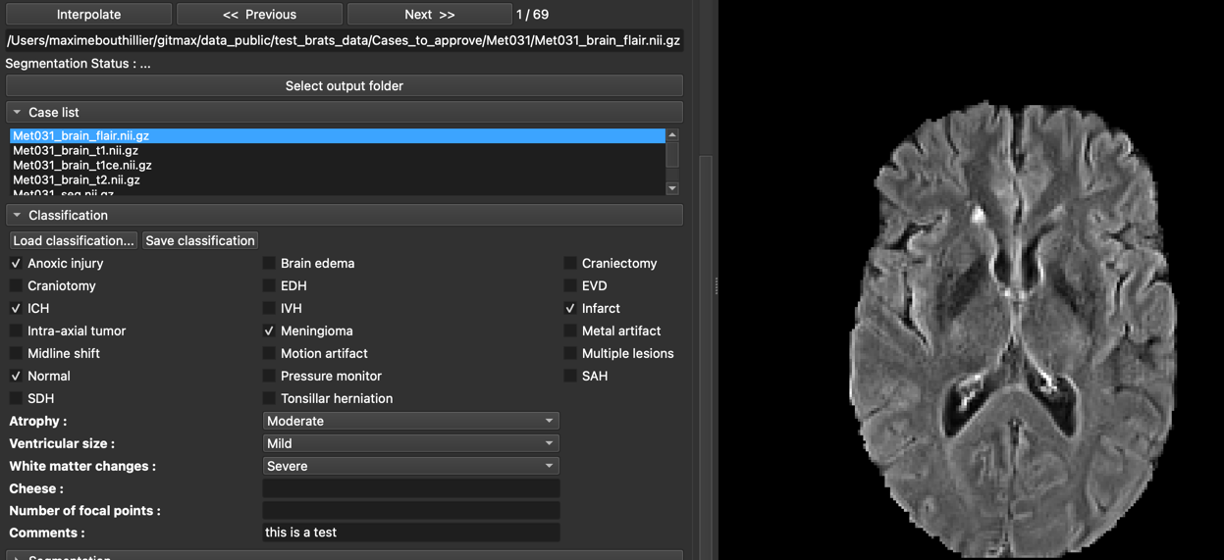
Classification
Click on the Classification window. Select the appropriate labels depending on your configuration, for each case.
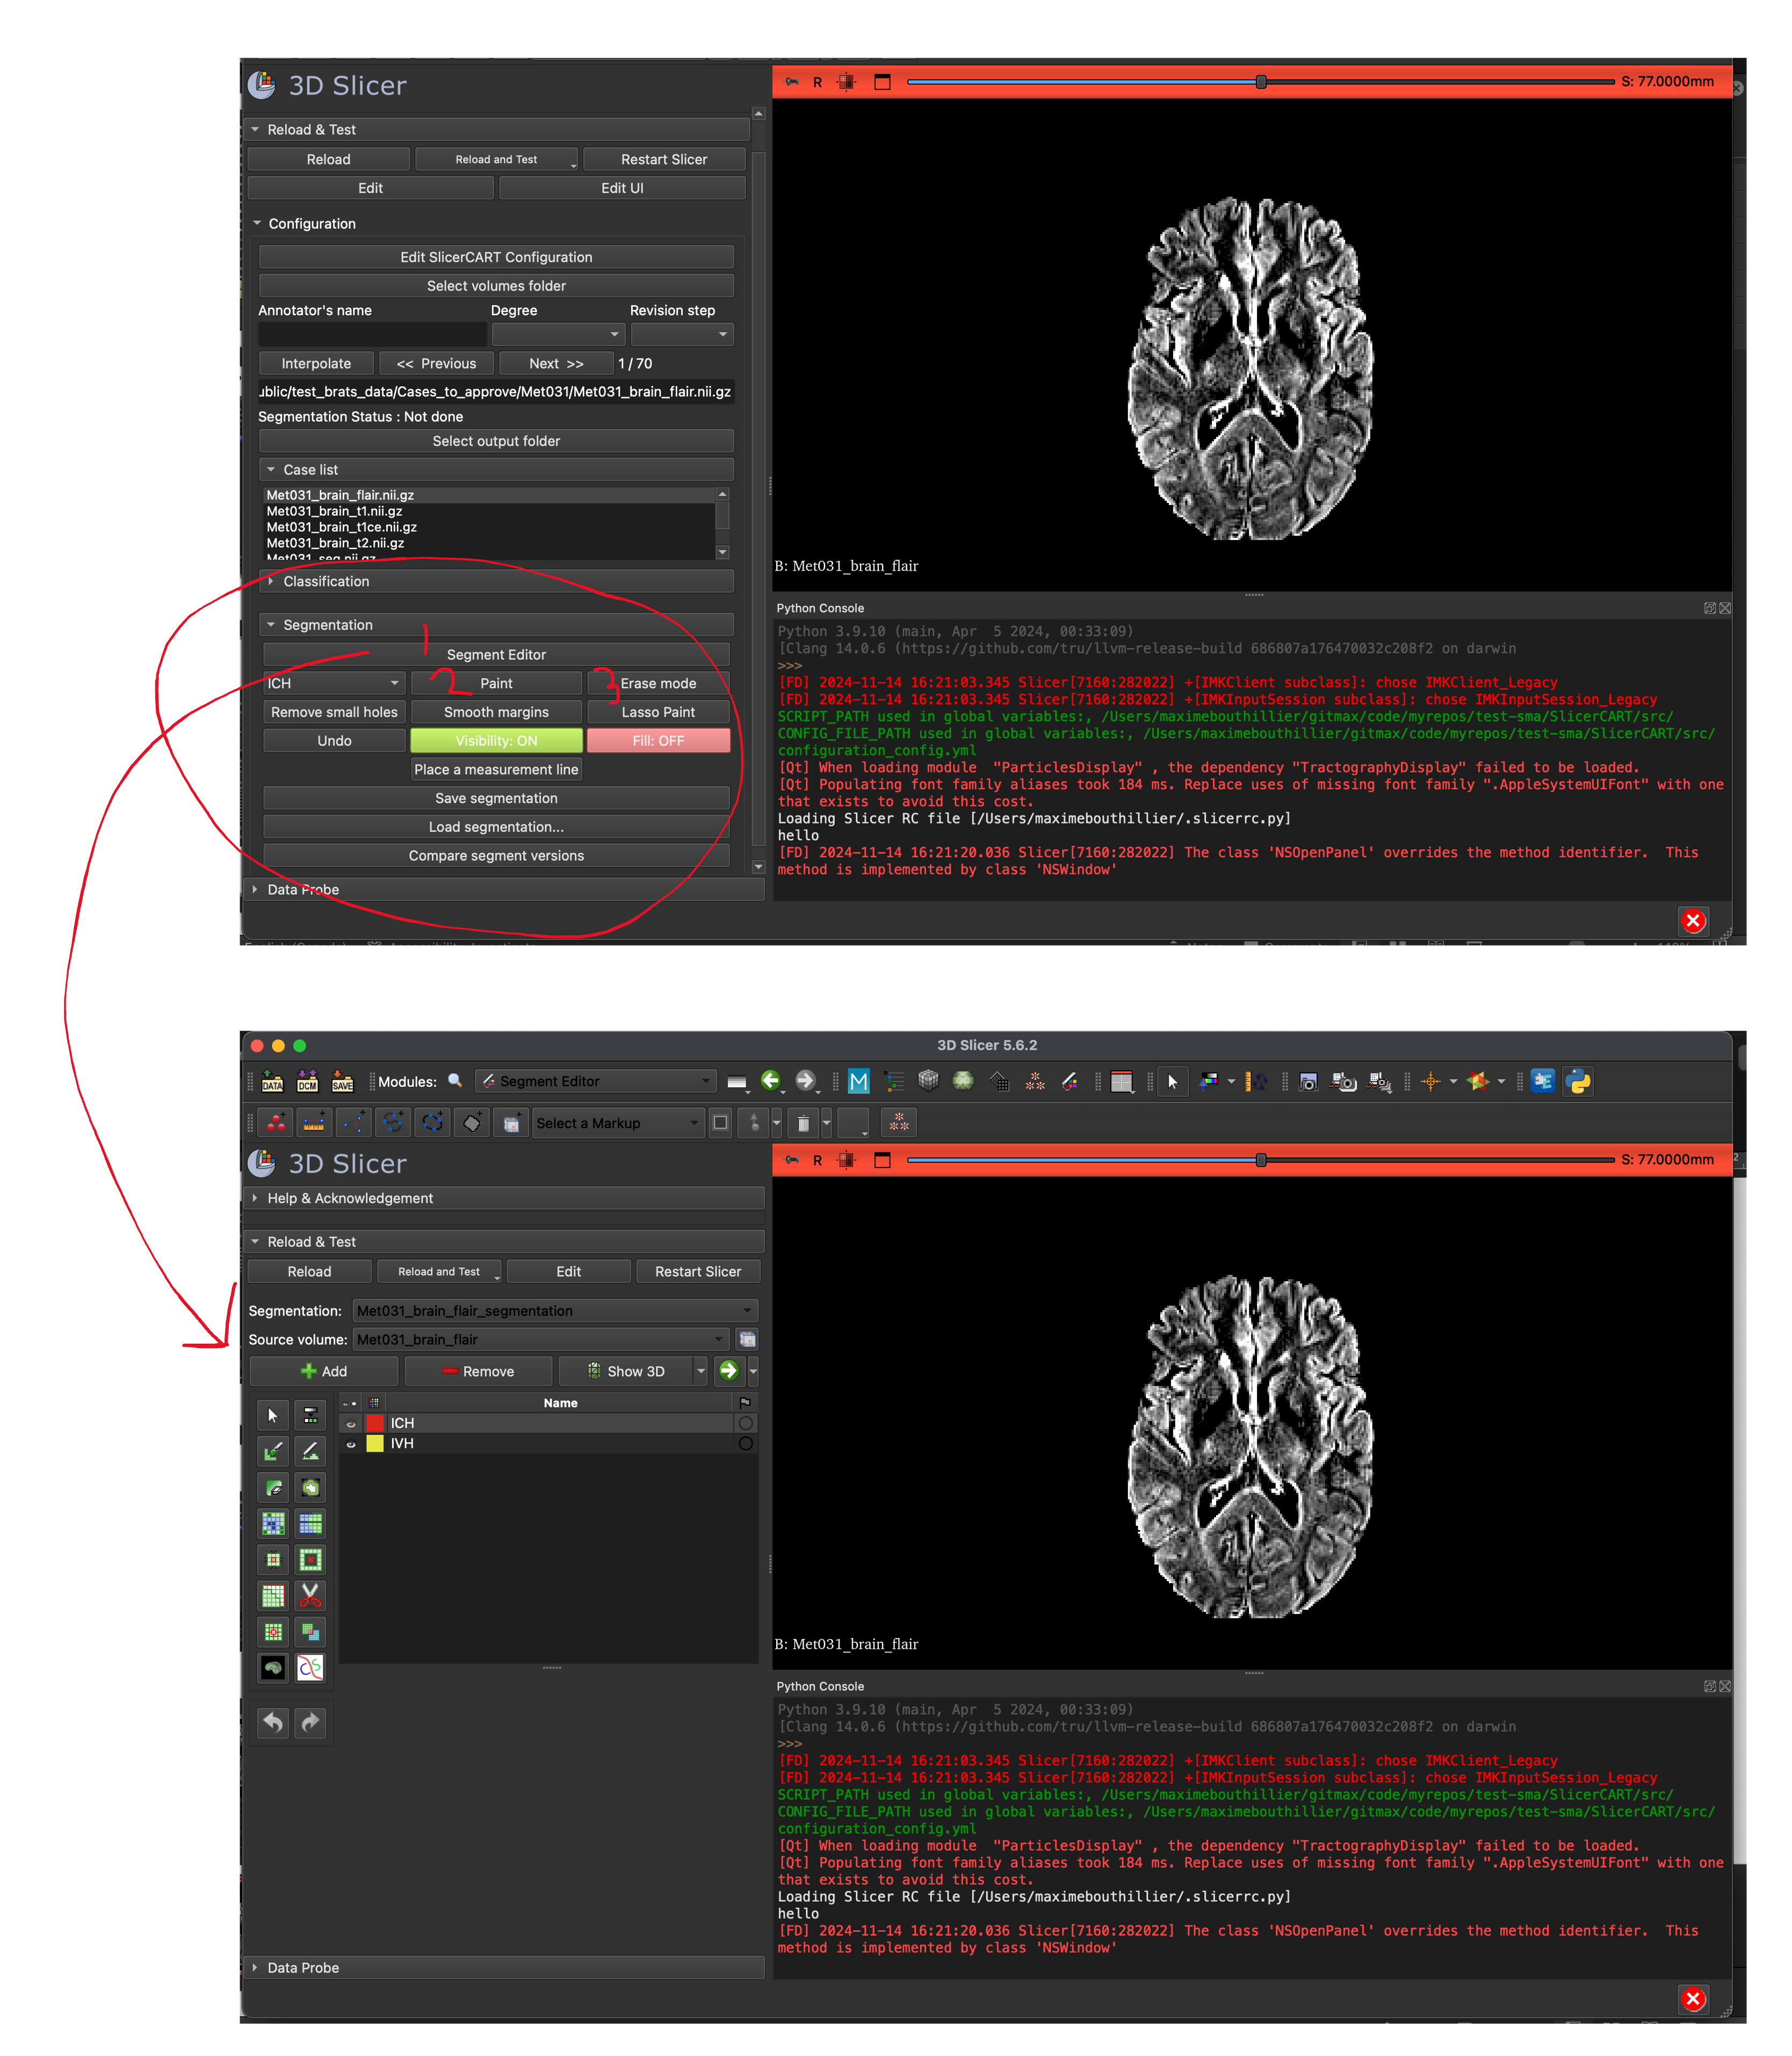
Segmentation
Click on the Segmentation window, then on the case you want to start segmentation. Click on:
SegmentEditor: opens the default segment editor of 3D Slicer
Paint: enables the user to paint the first mask label
Erase Mode: enables the user to erase the current segment label
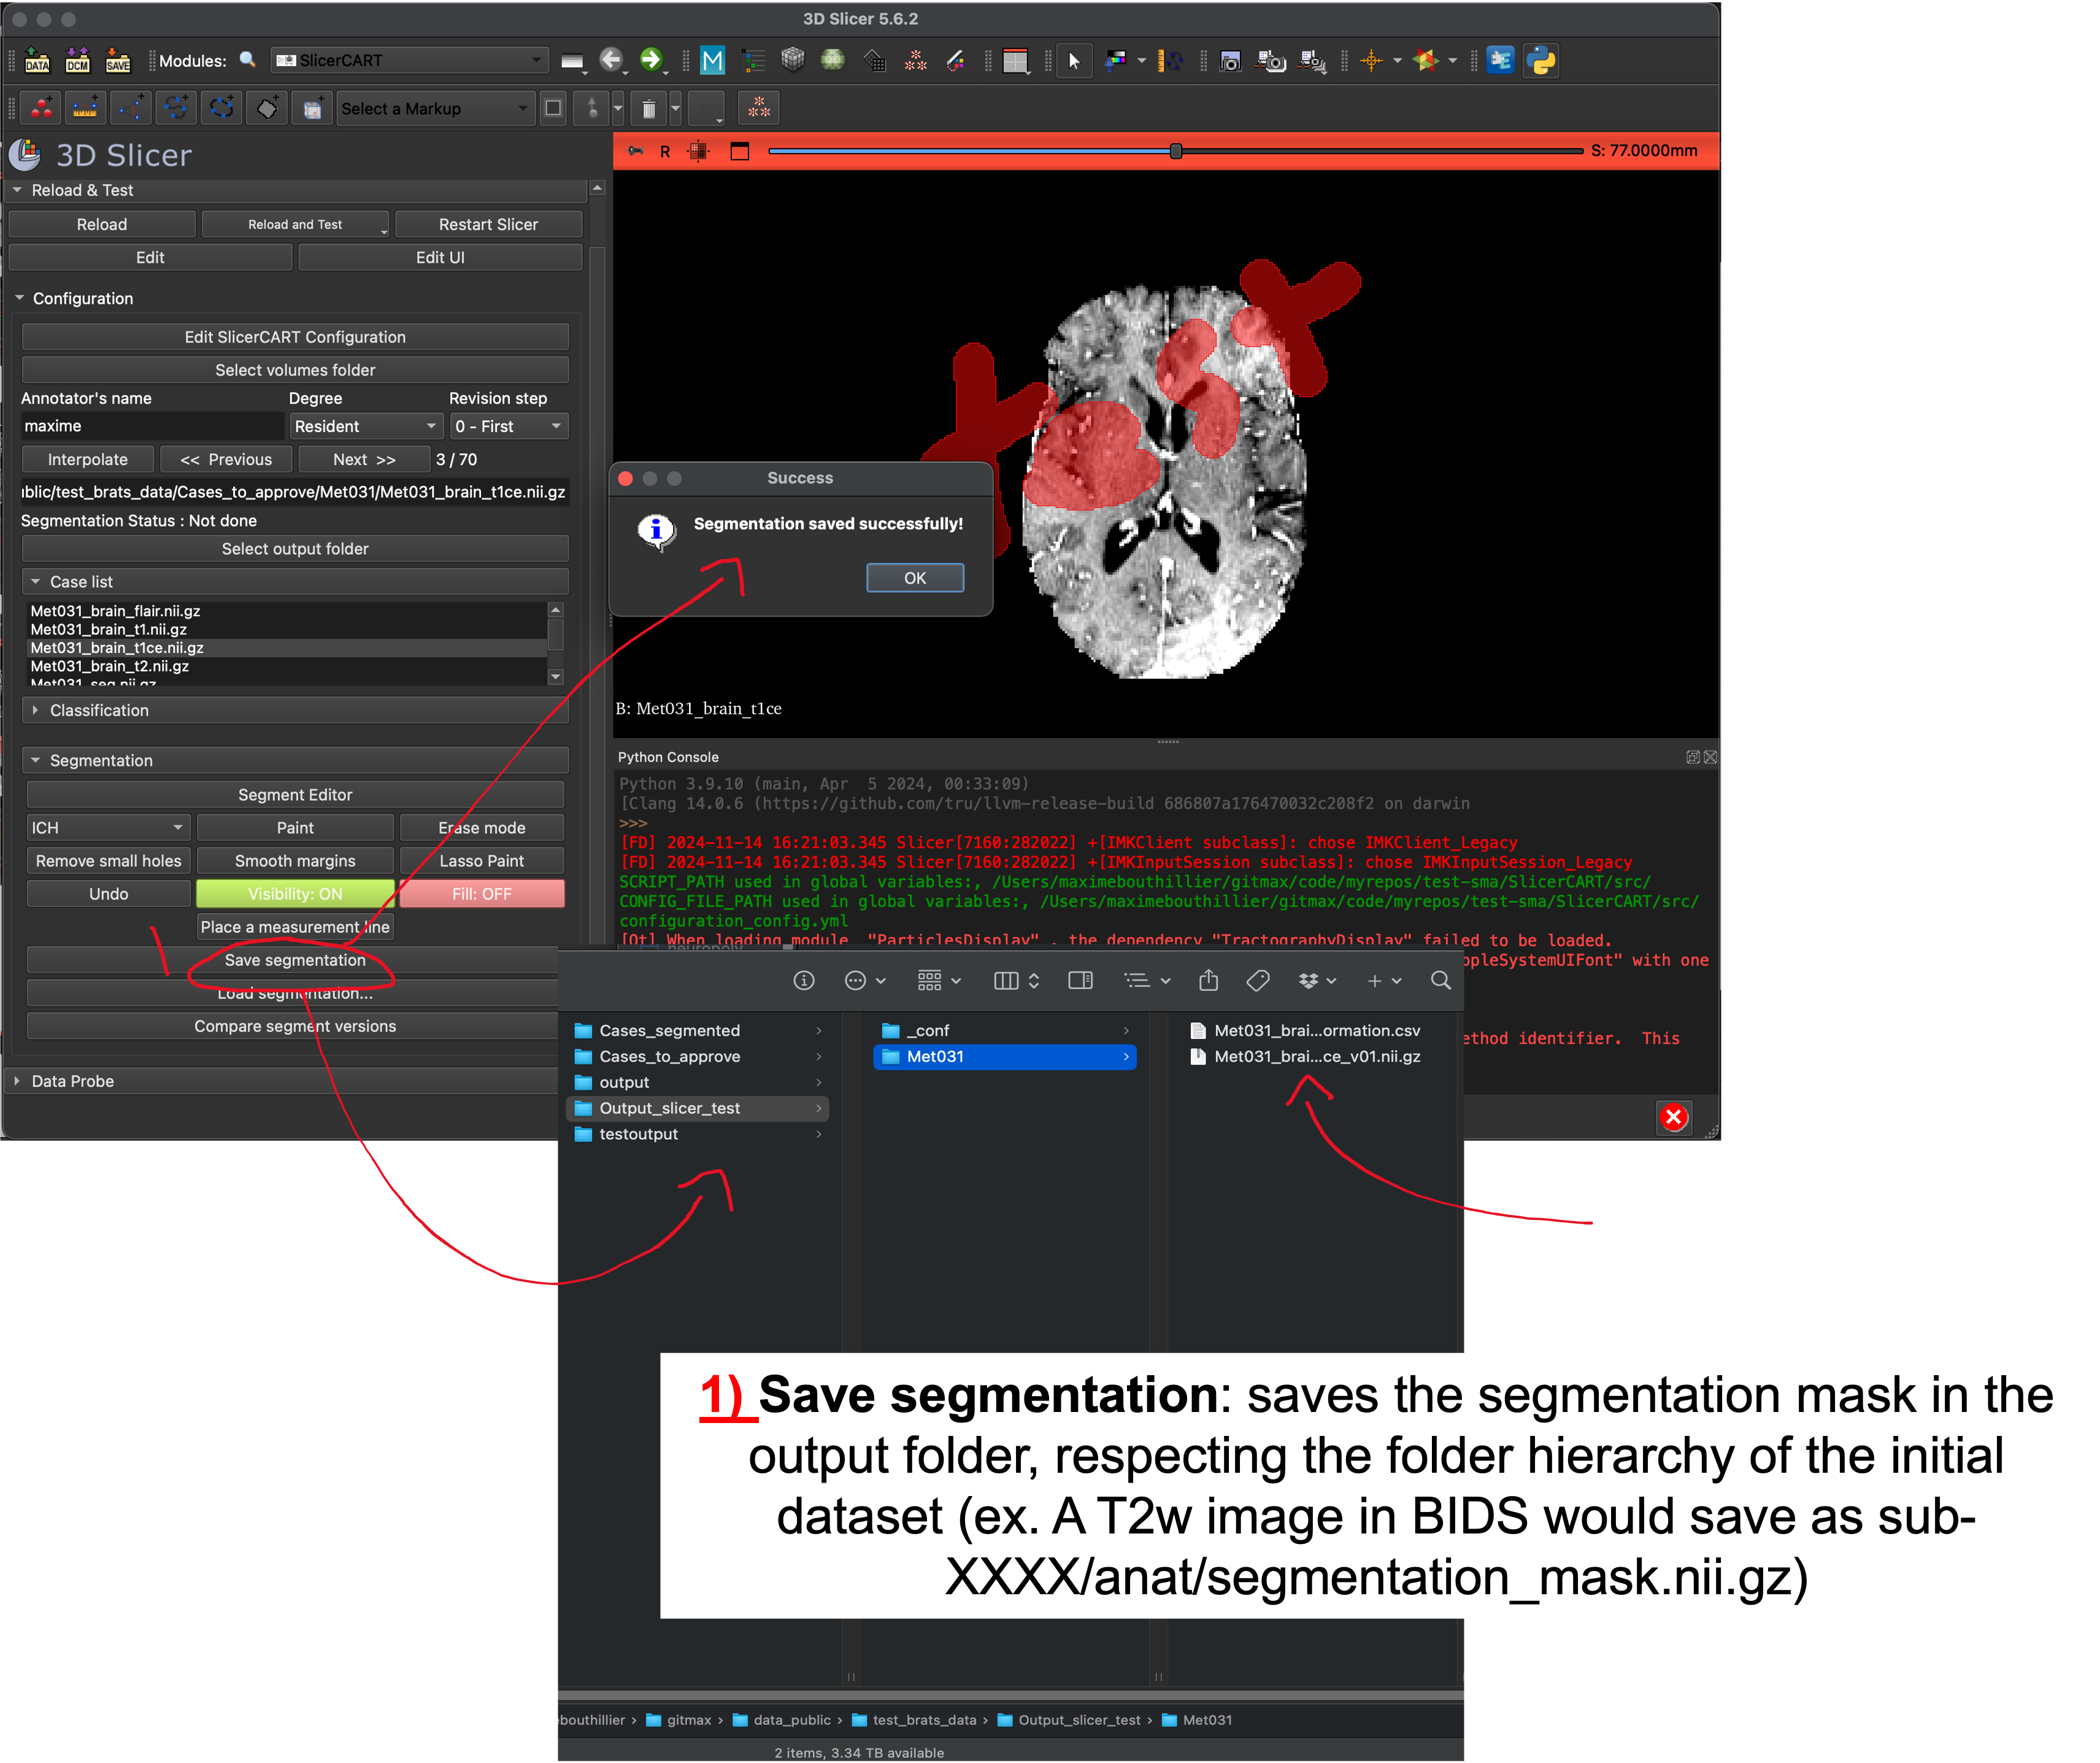
Save Classification OR Segmentation
N.B. You can only save segmentation OR classification labels separately (you cannot save both at the same time, for the moment).
Once segmentation is completed, click on Save segmentation (or Save classification) [or keyboard shortcut if defined] to save the segmentation mask or classification labels in the output folder.
Note that a .csv file will be generated for basic segmentation statistics (e.g. time of segmentation, annotator information, etc.). Classification data is saved in a separate .csv file per volume. Each .csv file can have multiple version (up to 99 is supported).
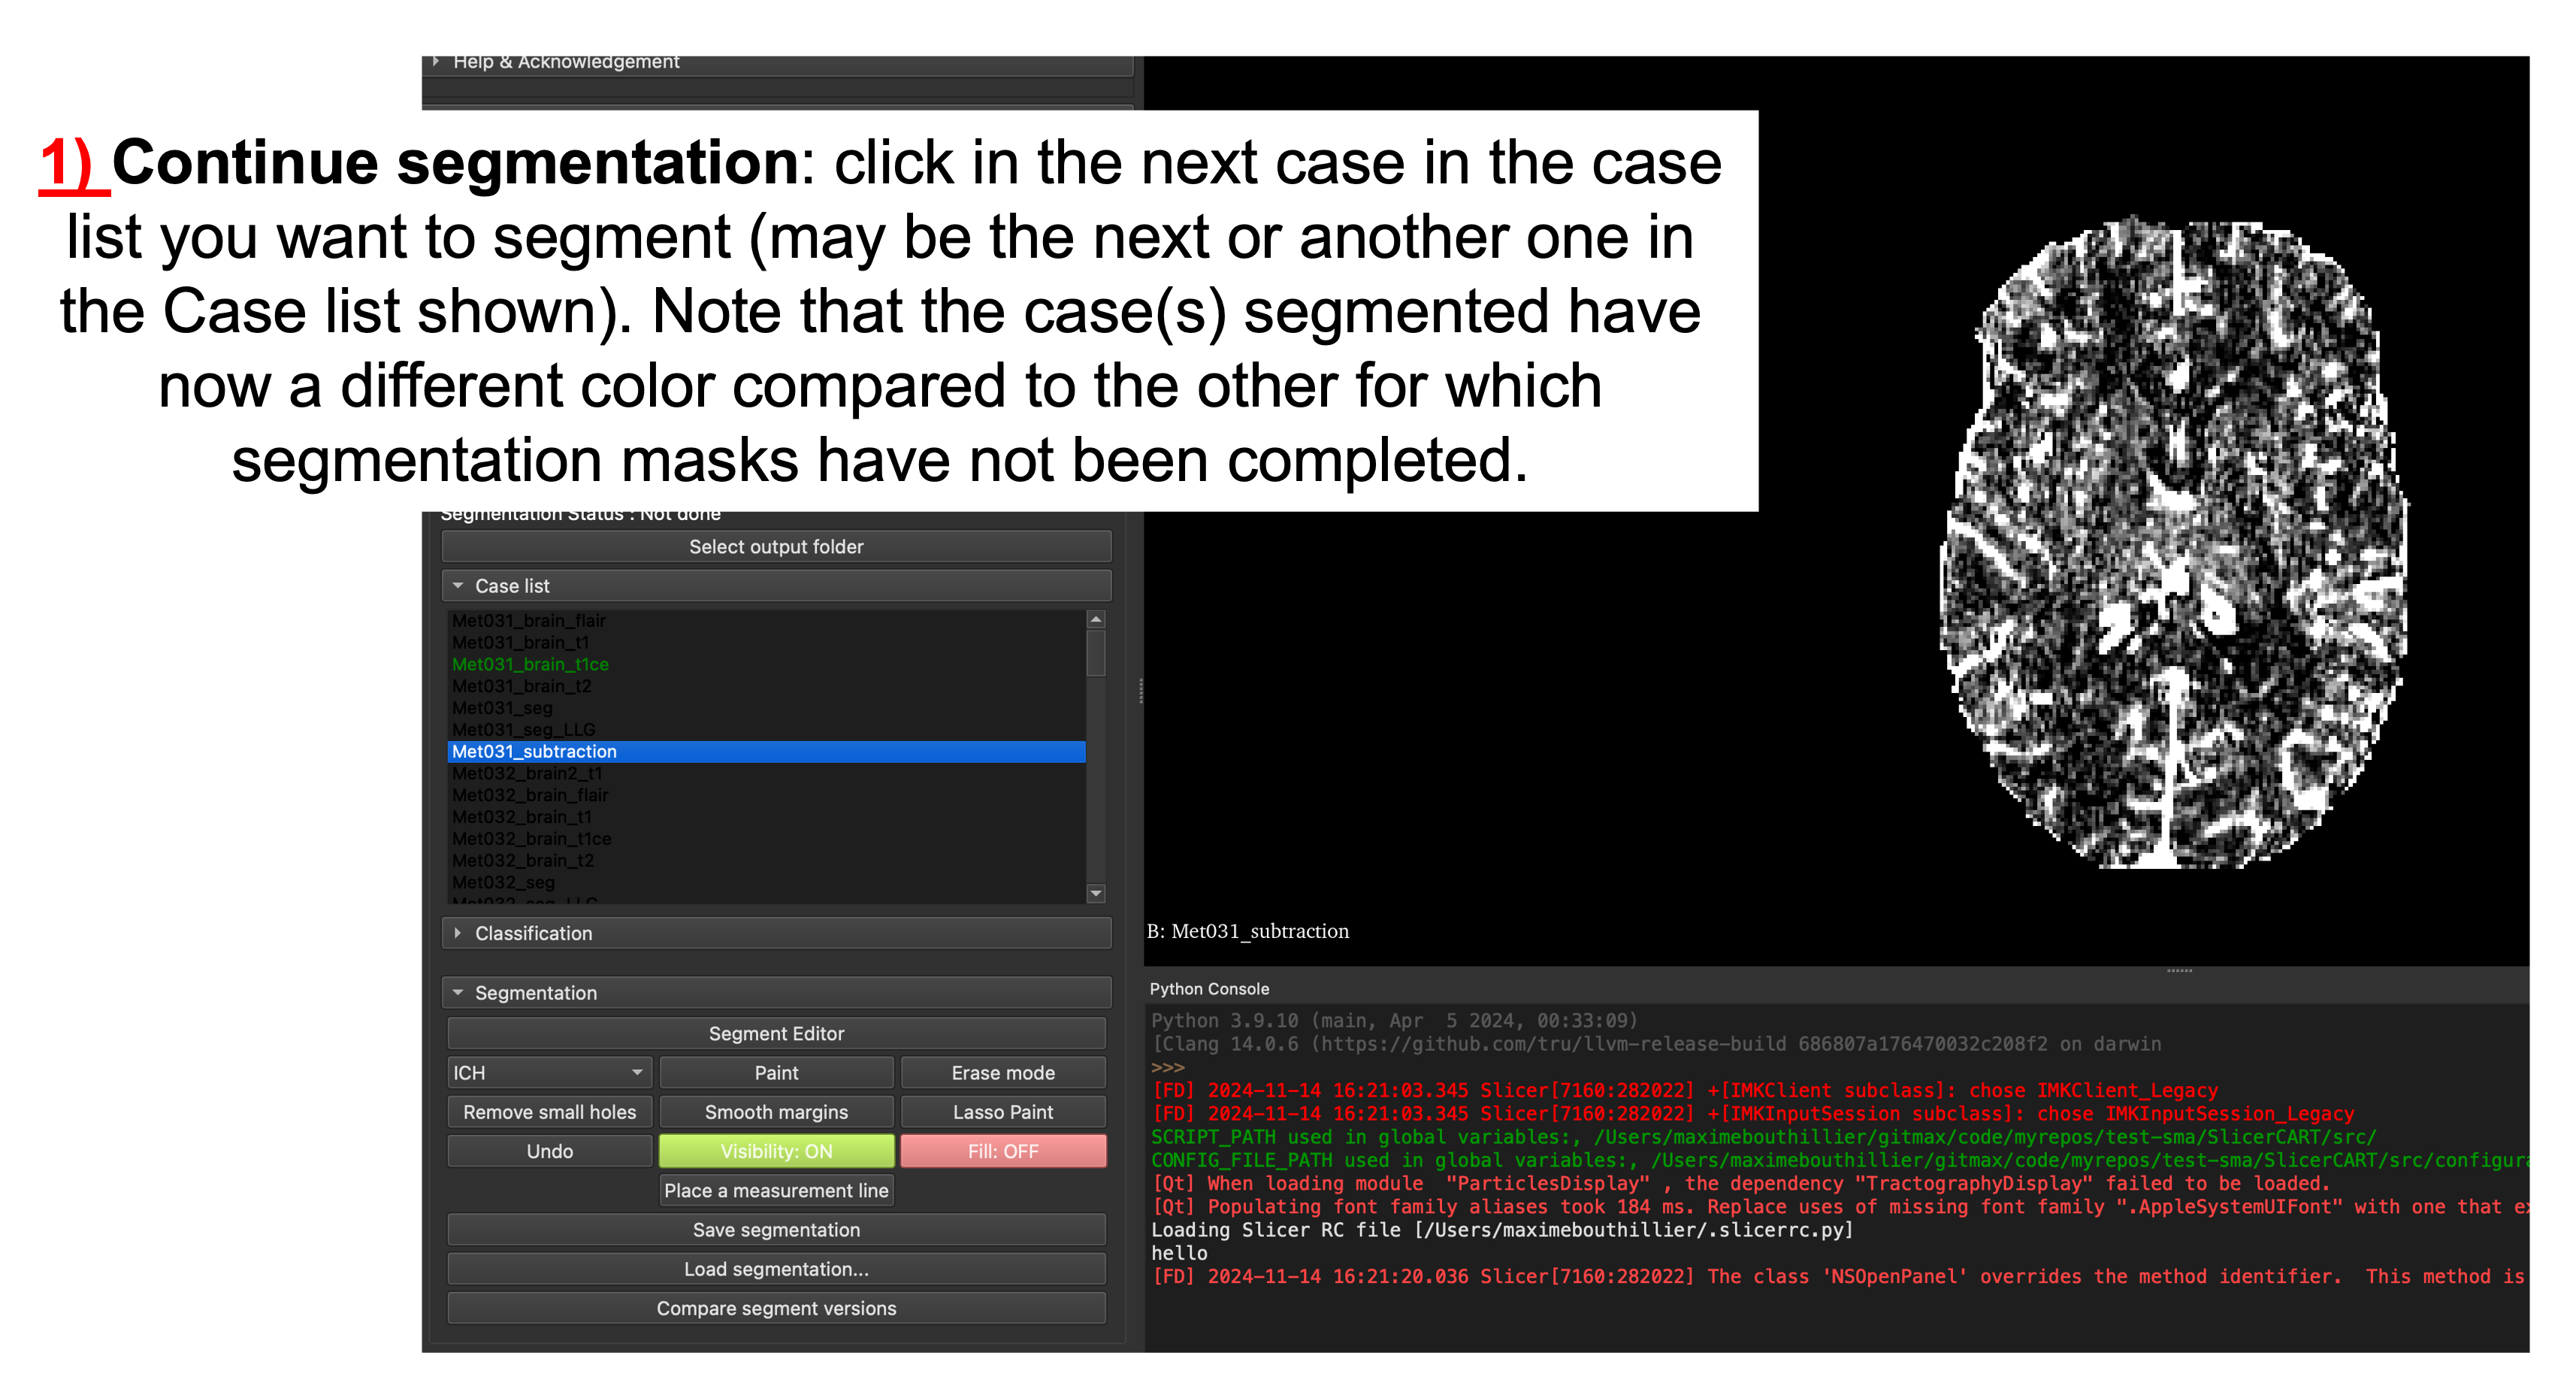
Go to the Next Case
After a save (whether classification or segmentation), the viewer loads automatically the next case (in the UI case list for classification; in the remaining_list.yaml file for segmentation). A pop-up appears if it is the last case in the remaining_list.yaml (or in the UI case list).
Feedback
If you have any question and/or inquiry, please open a new issue on SlicerCART Github.
Thank you!
The SlicerCART Team